Creating a New Bow
Requirements
-
You've done everything in Getting Started.
-
Dummy Blueprints which can be found in the Resources section.
-
Basic understanding of how to use Unreal Engine, there are a ton of tutorials for it and they apply to modding all the same.
After you're done setting up everything, launch the Palworld Modding Kit and let's get started.
Setup
-
Create the following folder structure:
Pal > Blueprint > MyNewWeaponMod > Blueprint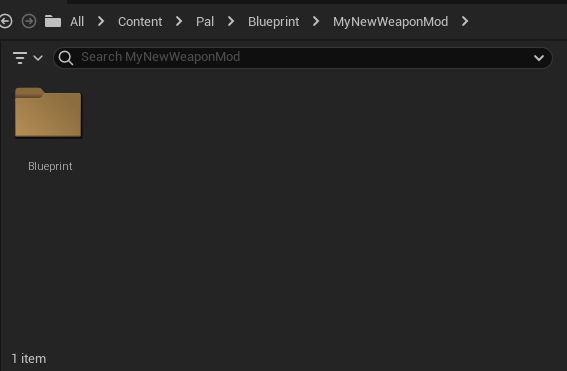
-
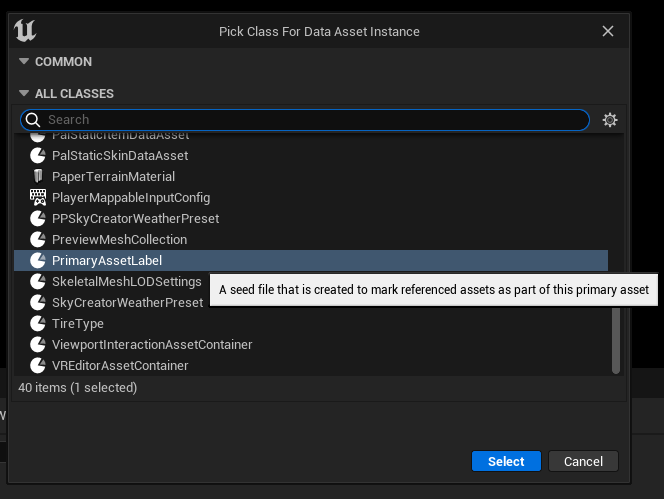
In the
MyNewWeaponModfolder, create a new Data Asset. When you click on Data Asset, it'll show a window asking you to pick a class for the data asset instance. SelectPrimaryAssetLabeland name the new Data Asset the same as your mod project which isMyNewWeaponModin our case.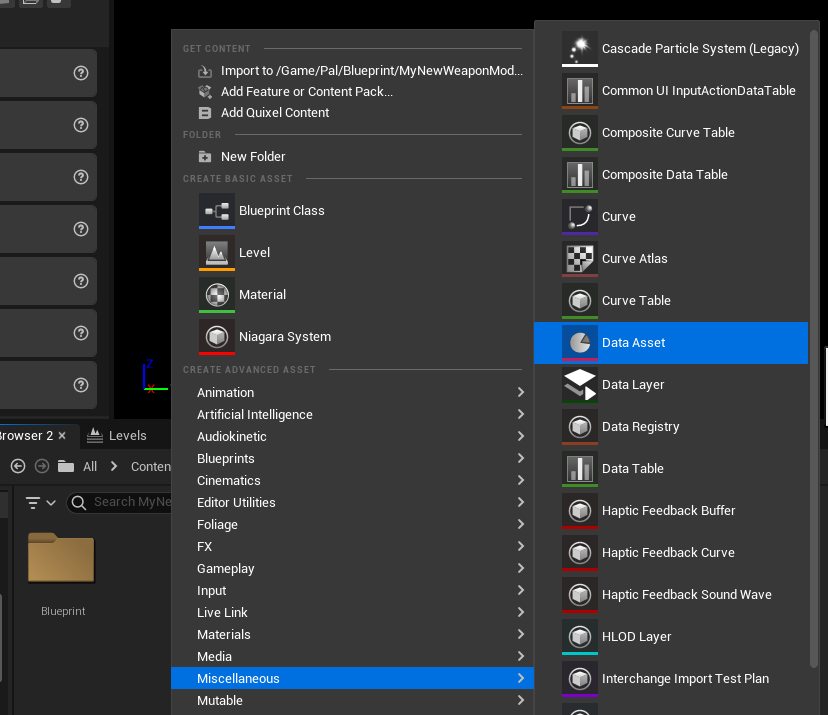
-
Open the newly created
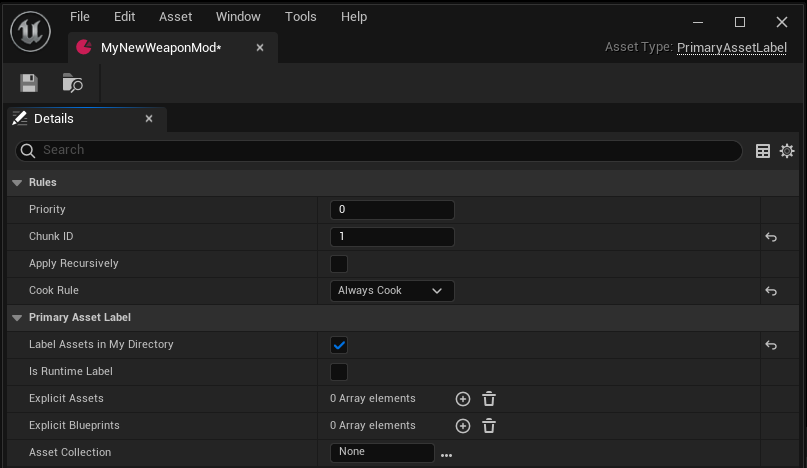
MyNewWeaponModData Asset and change the following values:-
Chunk ID: 1 - This controls which file the assets in your
MyNewWeaponModproject will be packaged into. For example we've set this to 1 so everything will be packaged into pakchunk1-Windows.pak after we package the project. Make sure to change this for every separate project you decide to create because otherwise everything gets packaged into the same file unless it's what you want.- Make sure to stay on the lower end with Chunk ID as the higher it is the longer it takes to package the project since the editor has to check each ID between your lowest and highest ID.
-
Cook Rule: Always Cook
-
Label Assets in My Directory: Checked - This makes sure everything inside the
MyNewWeaponModfolder gets packaged.
-
-
Save the Data Asset and navigate over to the Blueprint folder that we created inside
MyNewWeaponMod. -
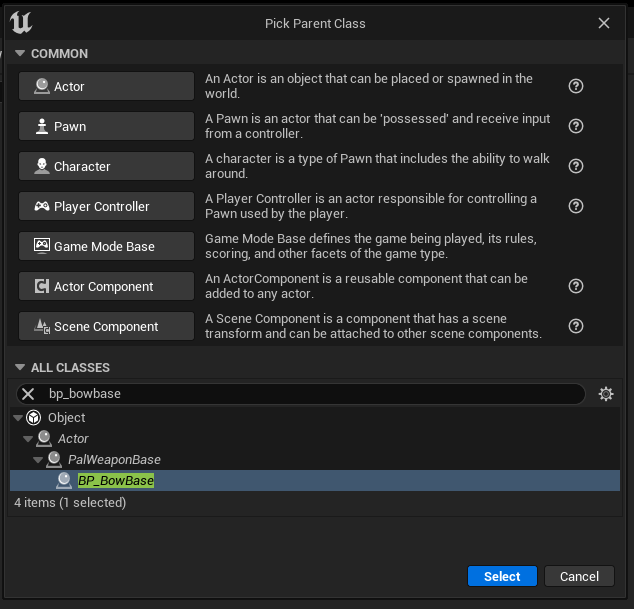
Create a new 'Blueprint Class' and when it asks to pick a parent class, search for BP_BowBase. Make sure you have Dummy Blueprints setup, otherwise you won't see it in the list.
-
We'll call it
BP_BowMeteorin this guide, but you can call it anything really. As for the BP_ prefix, it's just good practice to follow the standard. BP = Blueprint. -
Next, create a
Bulletfolder and inside the folder create another Blueprint and parent it toBP_Arrow. We'll call itBP_ArrowMeteor.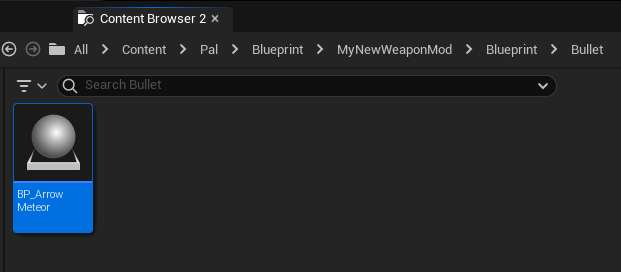
The Arrow
-
Open the
BP_ArrowMeteorblueprint and once the window is open, selectOpen Full Blueprint Editor. You should now have the Event Graph open.
-
Next, we want to add a new function override for the
On Hitfunction that our blueprint inherits fromPal Bullet.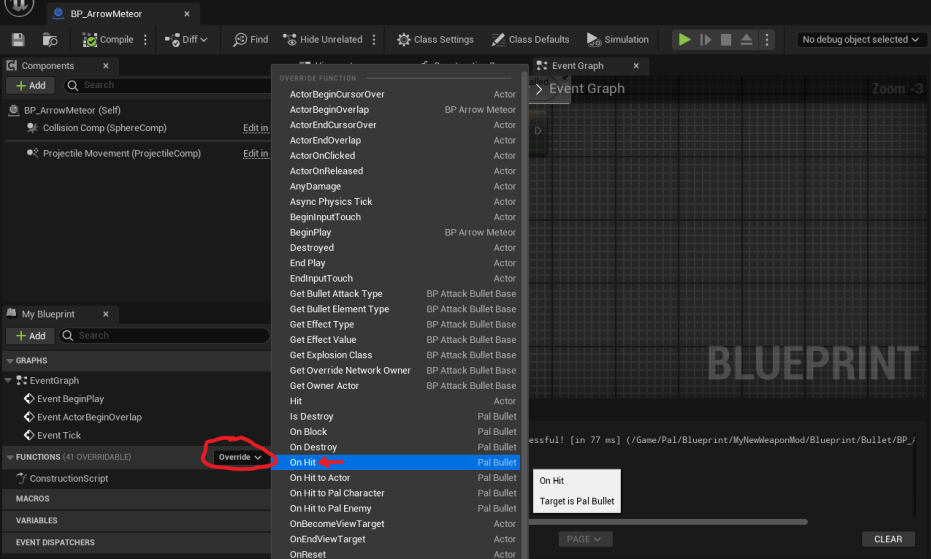
-
Right-click anywhere in the empty space and you should have a context menu open. Search for the function
Get Owner Actorwhich will get the owning actor for the weapon. Hover over the blue pin inGet Owner Actor, click and drag from it and then release on an empty spot next to theGet Owner Actornode. You'll want to look for theEqualfunction next and we'll connect it to theOther Actorpin that's in theOn Hitfunction override.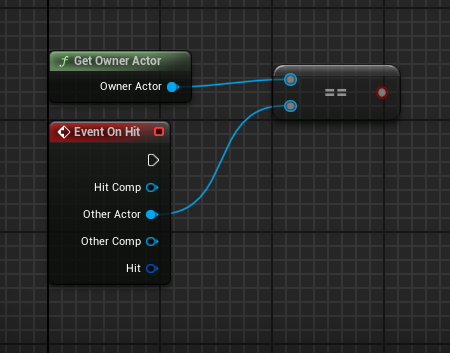
-
Drag from the red pin in the
Equalnode and search forBranchand add that to the graph. Create anotherGet Owner Actorfunction node aboveBranchand then drag from the blue pin to create aCast to PalPlayerCharacter. Connect theFalseexecution pin toCast to PalPlayerCharacter. This current setup is so that our own arrow ignores hits on our player character.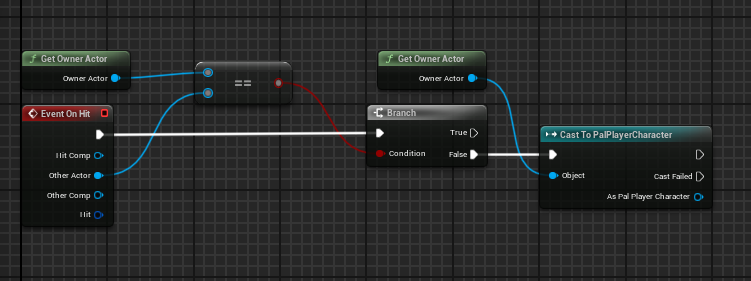
-
Drag from the right execution pin in
Cast to PalPlayerCharacterand create aSpawn Actor from Classnode. Click on theClassdropdown menu and search forBP_Explosion_Launcher_Meteor. Click the little arrow at the bottom of theSpawn Actor from Classnode we created so we can see all the properties in it.Set
Collision Handling OverridetoAlways Spawn, Ignore CollisionsYou'll want to connect the
As Pal Player Characterpin to theInstigatorandOwnerpins. Right-click on theSpawn Transformpin and selectSplit Struct Pin.We're connecting the owner of the weapon to the
InstigatorandOwnerpins because otherwise, the weapon won't do any damage and it will not register the attacker properly.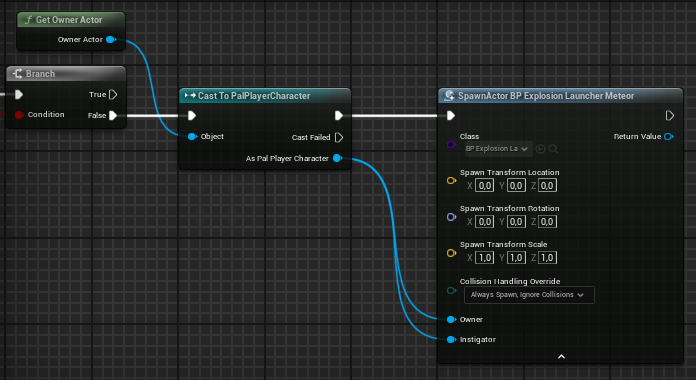
-
We'll want to go back to our
On Hitfunction override node we created earlier and drag from theHitpin and selectBreak Hit Resultat the bottom of the Context Menu. You'll get a Hit Result node with a lot of properties so we want to click on the little arrow at the bottom again to expand the node. Drag theLocationpin and connect it with theSpawn Transform Locationpin inSpawnActor BP Explosion Launcher Meteor.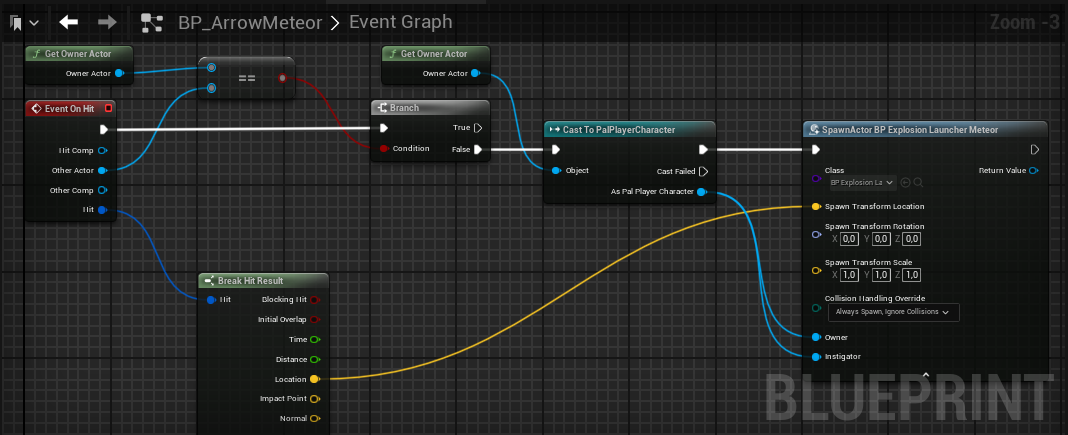
-
Almost done with
BP_ArrowMeteor. Next, we'll want to go back to ourSpawnActor BP Explosion Launcher Meteornode and drag from theReturn Valuepin and search forSet Powerfunction. Right-click anywhere on the empty space aboveSpawnActor BP Explosion Launcher Meteorand search for the following nodes in the context menu:Get Weapon DamageandGet Sneak Attack Rate.Connect the
Return Valuepin inGet Weapon Damageto theNew Parampin inSet Power.Connect the
Return Valuepin inGet Sneak Attack Rateto theSnake Ratepin inSet Power.
This sets the explosion damage based on our weapon's stats. You can even do your own custom logic to increase or decrease the damage based on certain conditions, but that will not be covered here. Feel free to explore and experiment!
-
Compile and Save the
BP_ArrowMeteorblueprint.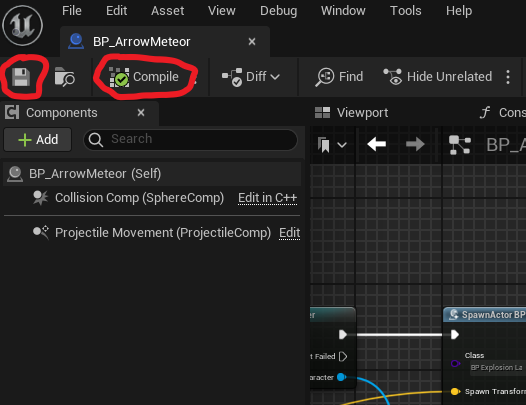
The Bow
We're almost done with our new weapon, we just need to change few things in the BP_BowMeteor blueprint we created earlier in this guide and we can start packaging the project.
-
Locate the
BP_BowMeteorblueprint and open its Event Graph. On the left side you'll see BP_BowMeteor and DefaultSceneRoot. Click on BP_BowMeteor and it should open the properties panel on the right side of the window. The only thing we need to change in the properties is theArrow Shoot Number, at least for this guide. SetArrow Shoot Numberto 1. This is how many arrows the bow will fire simultaneously.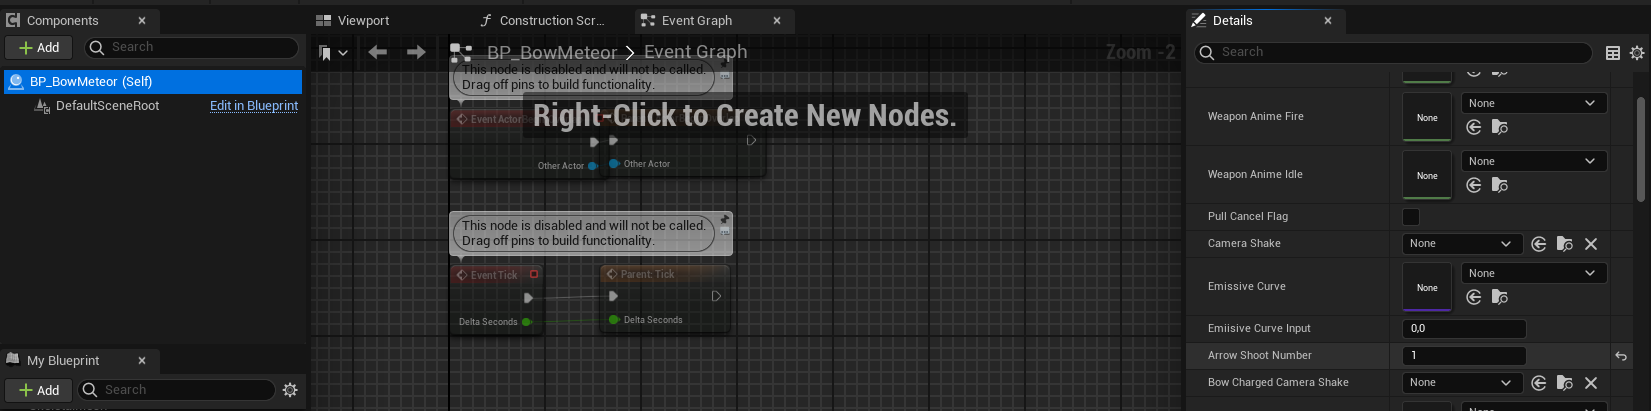
The reason we don't have to worry about the other properties is because we inherit from
BP_BowBasewhich means it'll already have defaults assigned to it, meaning we also inherit the model, animations and everything else necessary for the weapon to work properly. You're obviously free to change the Skeletal Mesh and Animations, but that's something that won't be covered in this guide specifically. -
Create a function override for
Get Arrow Class.
![]()
- Open the
Get Arrow Classfunction and you should see the following nodes in the image. Right-click on theParent: Get Arrow Classorange colored node and selectDelete.
![]()
-
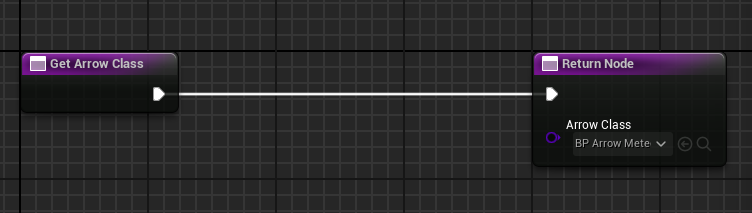
The
Arrow Classnode in ourReturn Nodewill now show aSelect Classdropdown. Click on the dropdown menu and search for ourBP_ArrowMeteorclass and assign it.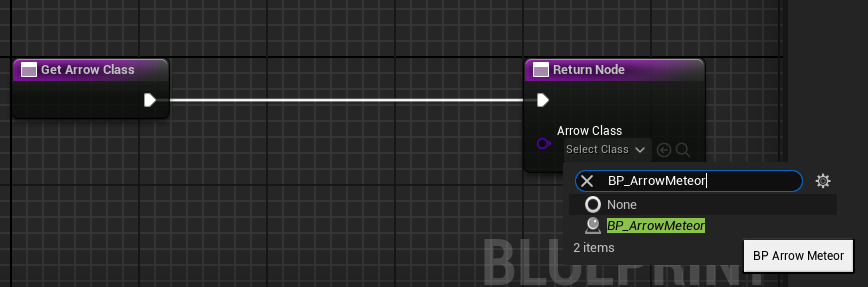
-
Done. Hit Compile and Save on
BP_ArrowMeteorand let's get packaging.
Packaging and Installing the Mod
We're finally done in the editor and can begin packaging our new mod, so let's do that.
-
Navigate to
Platforms > Windowsand click Package Project. A new window will appear, but you can just click onSelect Folderto use the default folder. You can go grab a coffee, tea or some snacks since it might take a few minutes depending on your hardware.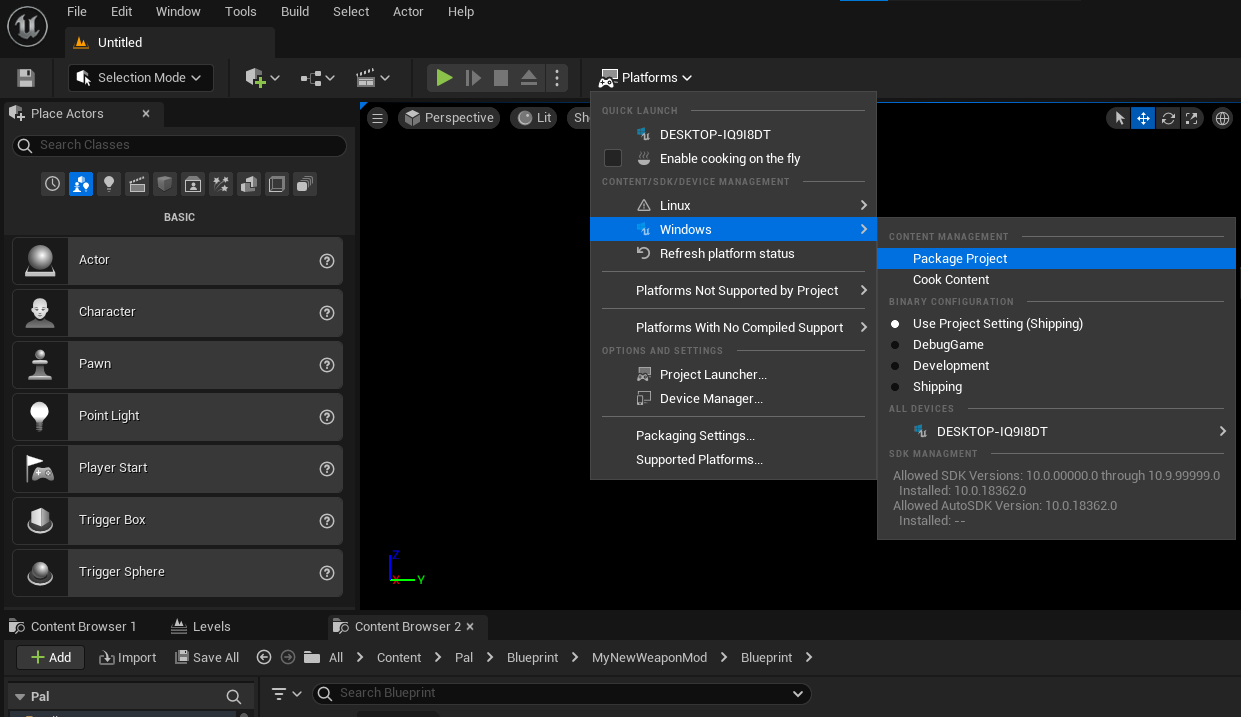
-
After it's done packaging, you can find your
pakchunk(id)-Windows.pakinside the PalworldModdingKit atWindows > Pal > Content > Pakswhere (id) is the ChunkID you assigned in yourPrimaryAssetLabelin the Setup section. So if you did ChunkID of 1 then you'll want thepakchunk1-Windows.pakfile.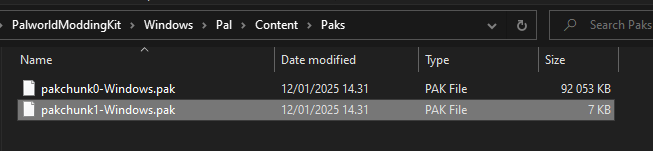
-
Move the
pakchunk(id)-Windows.pakto a ~mods folder where your Palworld is installed. If you don't have a ~mods folder then you can just create it.
-
This part is important, you must rename the file so the name ends with
_P, this is so Unreal can recognize the file as a patch pak, otherwise it will not be loaded by the game at all. Let's call itBowMeteor_P.
-
Done.
Pal Schema
Now, to make sure our new Bow is actually usable in the game, we'll have to create a PalSchema mod for it. If you haven't yet, go through the Getting Started guide first and then come back to this part as it will explain the basics of PalSchema and how it works.
-
In the
PalSchema/modsfolder, create the following folder structure:MyBowMods/itemsAfter that, you'll want to create a json file called
meteor_bow.json. Feel free to name it whatever you'd like of course, as long as it's a json file.

- Open the
meteor_bow.jsonwe created and copy this inside it:
{
    "MOD_Bow_Meteor": {
        "Name": "Meteor Bow",
        "Description": "My first weapon!",
        "Type": "Weapon",
        "IconTexture": "/Game/Others/InventoryItemIcon/Texture/T_itemicon_Weapon_Bow_Fire.T_itemicon_Weapon_Bow_Fire",
        "TypeA": "Weapon",
        "TypeB": "WeaponBow",
        "Rank": 1,
        "Rarity": 0,
        "Price": 5000,
        "MaxStackCount": 1,
        "Weight": 5.0,
        "MagazineSize": 1,
        "AttackValue": 250,
        "SneakAttackRate": 1.0,
        "Durability": 1000.0,
        "actorClass": "/Game/Pal/Blueprint/MyNewWeaponMod/Blueprint/BP_BowMeteor.BP_BowMeteor",
        "Recipe": {
            "Product_Count": 1,
            "WorkAmount": 500.0,
            "Material1_Count": 1,
            "Material1_Id": "Stone",
            "Material2_Count": 1,
            "Material2_Id": "Wood"
        }
    }
}
I've covered most of these in the Getting Started guide, but I'll be going over some of the fields that weren't mentioned.
actorClass: This is the important field for weapons, we want this to point at our weapon actor we created in the earlier steps which is theBP_BowMeteor.
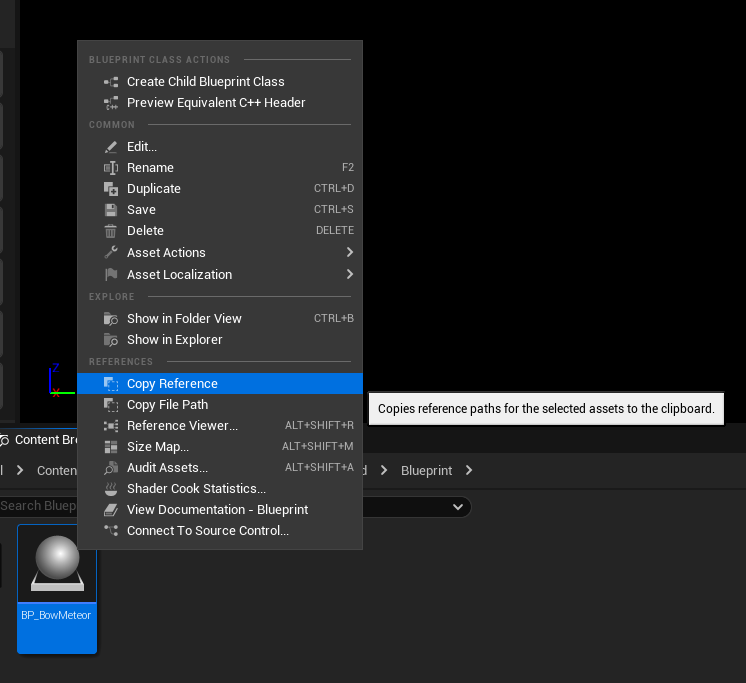
You can obtain the path to the weapon actor by going back into Unreal Editor, right-clicking on the BP_BowMeteor asset in the Content Browser and selecting Copy Reference which will give you a string like:
/Script/Engine.Blueprint'/Game/Pal/Blueprint/MyNewWeaponMod/Blueprint/BP_BowMeteor.BP_BowMeteor' which you'll have to trim down and modify to /Game/Pal/Blueprint/MyNewWeaponMod/Blueprint/BP_BowMeteor.BP_BowMeteor.
-
MagazineSize: Self explanatory, but you can also leave it out entirely and the weapon will have infinite ammo, if that's what you want. -
AttackValue: How much damage the weapon should do. -
SneakAttackRate: Damage multiplier for when you attack enemies that haven't noticed you. -
Durability: Self explanatory.
Since our TypeA and TypeB are set to Weapon and WeaponBow and the Rank is set to 1, our weapon will be available for crafting starting from Primitive Workbench, which makes testing a lot easier.
You're free to change the crafting recipe to whatever you'd like, but I set it as Stone and Wood since those are materials we can find easily for testing purposes.
- After you're done, save the file, load up Palworld and enter a world so we can test it out.
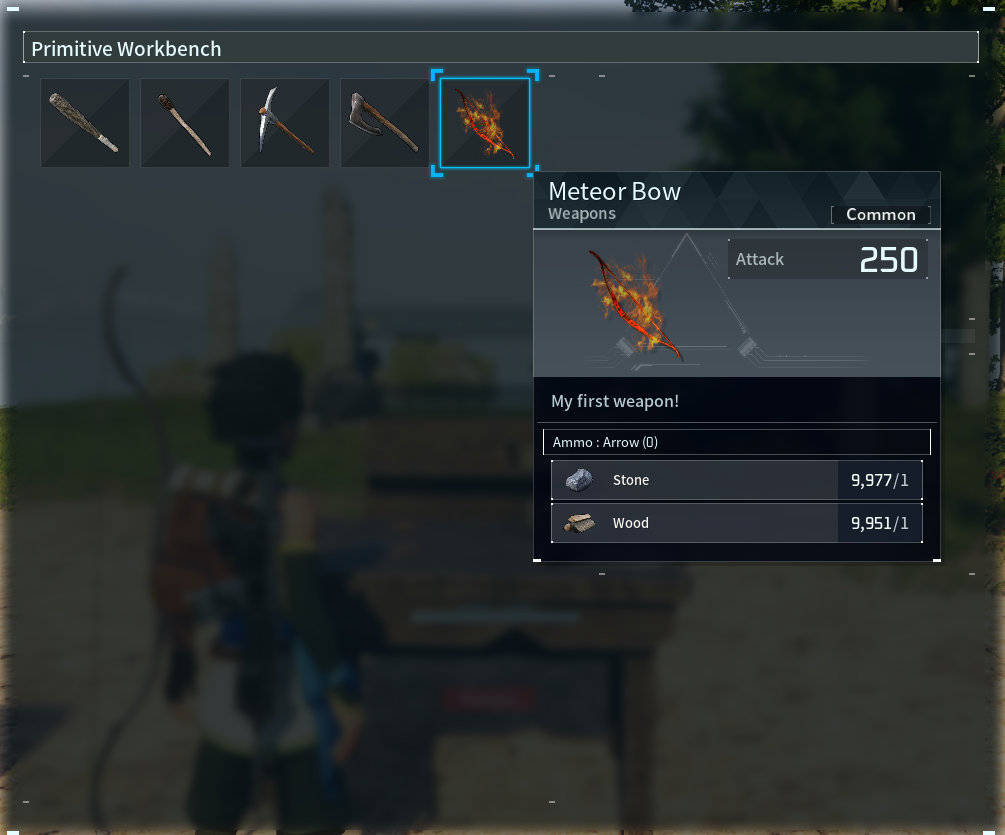
Success! We've made our first custom weapon in Palworld. I'll include a little video preview below of the finished product:
Final Notes
You might be wondering, how would I do this on Game Pass since the asset format is different (ucas, utoc, pak)? You can simply just go into Edit > Project Settings > Packaging and enable the Use Io Store checkbox. Make sure to disable it whenever you're packaging for Steam.
This is subject to change as we don't know when they'll switch the format to be the same for both Steam and Game Pass.
Instead of a .pak file, you'll have three files which are .ucas, .utoc and .pak and you'll want to copy these over to where your Game Pass version is installed. This is the only difference between Steam and Game Pass.